Showing posts with label mobile. Show all posts

Thursday, 1 January 2015

Goodbye 2014... Hello 2015

Just a short post to wish you all a Happy new year and to say goodbye to 2014. We have put quite a few things off recently due to a death in the family, blogging has been one of those things but we have still been muddling through in a quiet way and we are now very much looking forward to 2015 and all the new challenges it may bring.


We still made some Christmas decorations for our home, but this year things seem to have taken a simple, more natural approach. Both my husband and I have made some Christmas baubles, complete with pyrography, from a section of an old branch.


I made this pine cone garland, another very simple, natural craft that looked so beautiful on the fireplace. I am definitely thinking of making some more of these next year.


Another one of my favourite additions this year was the snowflake mobile. My husband hung a twisted willow branch, that had been sprayed slightly with silver glitter to give it a frosty feel, in the window. We then hung snowflake decorations and crystals from it to give a feel of snow. It was very difficult to get good photos of this but it looked amazingly magical.


My husband helped the children to make these wooden snowmen using offcuts of wood, which they chose to paint. So most of the decorations we made this year had a wooden feel to them.

Well that's some of the things we have been doing at this very busy time, all that's left to do is wish you all a very Happy new year!


Sunday, 31 July 2011

Corn dragonflies

Tomorrow is Lughnasadh or Lammas, the first of three pagan Autumn harvest festivals, in many different cultures people celebrate at harvest time. So today we are making corn dragonflies, my children are a little young to weave corn dollies so we have gone for something a little easier.


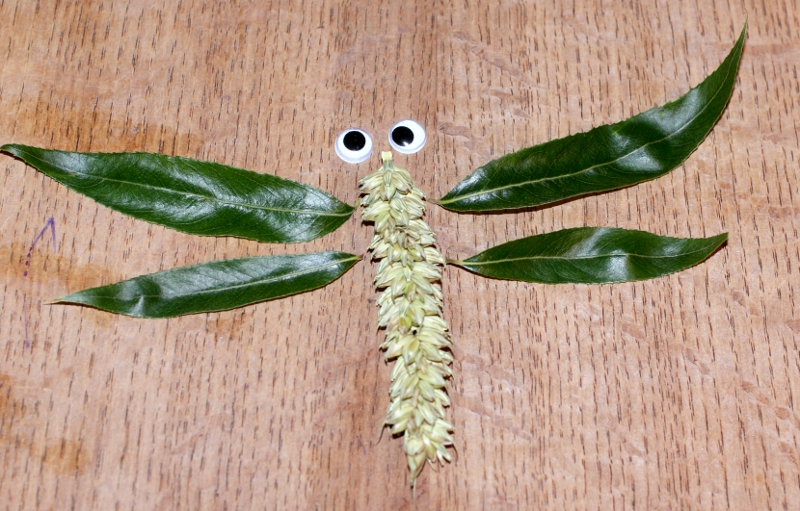
These are some things we collected from the garden, the corn stalk (or barley) had grown up under one of the bird feeders from dropped seeds and the leaves have come from our willow tree.


This is the layout for our dragonfly before the sticking commences, large googly eyes will be added at the front end to get the dragonfly look. We have also tried to pair up the leaves to match in size, with two larger ones at the front and two smaller ones at the back.


As you may notice in the above photograph, it is possible to slightly lift the individual seeds in rows and glue the leaves underneath. This will give your final dragonfly a much neater look and it also helps to hold the leaves in the correct position until the glue dries.


And there you go... two little corn dragonflies, once the eyes are fixed in place. We added cotton thread so they could be hung in the window. I originally thought that we would hang them from the trees in the garden so that birds could collect the seeds but the children wanted them hung inside for the time being anyway. We also made lavender butterflies in the same way as a pretty and natural way to infuse the house with the smell of lavender.


Here they are hanging with some of the butterflies, we have grouped them all together and tied them to a piece of stick so that it looks like a small mobile, but they look equally nice hanging on their own.  I am thinking of hanging some lavender butterflies in the bathroom window to add a relaxing aroma to the room.


We made the lavender butterflies in the same way except this time we have used lavender flower heads for the body and eucalyptus leaves for the wings. These are a beautiful purple and silver colour and smell fantastic.


This is the layout we used for the butterflies and stuck them together in the same way as before. The children really enjoy
nature crafting in this way and this has the added bonus of smelling wonderful too.


Tuesday, 8 February 2011

Crayon Heart Mobile

Valentines day is coming up very soon and the children have been getting involved in some heart related crafts. We loved the look of the crayon window pictures we had seen but we didn't have any waxed paper so at first we dismissed this idea but my husband came up with the idea of printing / staining normal paper with melted crayon, so we thought we would give it a go and see what happened.


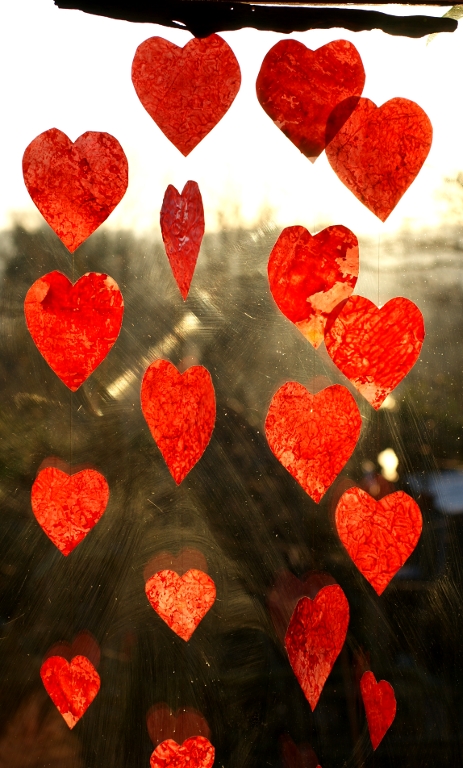
As you can see the effect is rather stunning, we ended up printing flat sheets of paper and paper after it had been crumpled to see the different effects left by the melted crayon. After assembly our mobile looked like this.


Doesn't it look lovely?  The children love crafts and we are hoping to try as many different crafts as we can, this was the first time they had melted wax crayons and it was quite exciting. First we took some old broken crayons in valentine related colours and the children grated them.


They then sprinkled the gratings onto baking paper, we placed some card onto the table first to protect the wood surface.


After they were happy with their design, we put another sheet of baking paper over the crayons and ironed them until the gratings were melted. Keep checking as this happens very quickly.


After the wax crayon has melted and cooled very slightly, peel off the top layer of baking parchment and put a normal sheet of printer paper or any other paper onto the wax, replace the parchment and iron again. This time the wax will stain or print the normal paper, we managed to repeat this process several times before all the wax ran out, sometimes we crumpled up the paper first to get a different, textured effect.


Leave each stained sheet to dry, the photograph above is one of the crumpled pieces of paper drying. It doesn't take long to dry then you can cut out your chosen shapes, we have chosen hearts for valentines day.


We cut out lots of different size hearts, the photograph above shows the range and contrast in colours, patterns and textures of the paper.


We then strung the hearts onto a piece of driftwood that we collected in the summer, any thing will do here you could even use any twig from the garden. We chose the driftwood as we felt it gave an interesting dimension to the mobile. Each piece of thread has to be long enough to accommodate how many hearts you chose to thread, we have threaded 4 or 5 on each string along with a wooden bead at the bottom to finish it off. You can use a needle to thread on the hearts and beads or just use invisible tape on the back.


There you have it an alternative way to use wax crayons to make something very pretty to hang in the window.


We had very little sun when we made this as it was a very cloudy day, but we had a few minutes to snap this picture to try to show the effect of the sun shining through the hearts. Trust me the photographs really do not do justice to the hearts at all.


They are very beautiful, each one is uniquely coloured and patterned.


As we made so many of these hearts, I have kept some in the craft stores to be used on other projects, I think they would look really nice on greetings cards or even gift labels.


Saturday, 30 October 2010

Bats and Lanterns.


   More Halloween crafts, this time we have decided to make lanterns in the style of the sleepy hollow ones, only much more child friendly. The lamp on the left is a faerie lantern that my children bought for me (we didn't make this one) the one on the right is the one we made. we chose some stiff black board and made sure it would fix around a jar. Using a jar ensures that your cardboard doesn't burn and your tea light candle is held safely. We cut out our Halloween picture from the card and fixed a piece of tissue paper to the rear of the cut out shapes. Orange in this case to match the pumpkins waiting to be carved.


  Once this is completed you can roll your cardboard into a cylinder and fix it, we just used tape. then put your cylinder over the jar with the tea light inside. wait until after dark and light the candle. This will definitely wow the children and provide a spooky atmosphere.  A really eye catching lantern for our display. We will be keeping ours out of reach of our youngest children for candle safety reasons.


    I really love bats and no Halloween display is complete without bats, the above bats were very, very simple to make. We love to recycle as much as we can so we cut the bat shapes out from the crinkly black paper covering that comes in chocolate boxes. this gives them a slight 3D look and they make a crinkly noise when you touch them. Once cut out, the children stuck little sequins on for eyes so that they catch the light... added spookiness. Then they were hung onto a hanger using fishing line and left in a doorway to brush against the face of an unsuspecting passer by.


   We had some bats left over and didn't want them to go to waste so these were positioned on the wall as if they were just flying past. So as you can see we have been really busy, these are just a sample of the things the children have been making.