Showing posts with label handmade. Show all posts

Wednesday, 20 December 2017

Natural wreaths

Following on from my last post showing how we made the wreath bases, I promised to add a few photos when we had finished decorating them. We prefer the natural look and usually prune a little overgrown greenery from our gardens to decorate with, which has the added bonus of being completely free.


This is our front door wreath, as you can see it has a completely green and natural look. I have used clippings from holly, ivy, pine and added a few pinecones. Some twigs have just been woven straight into the twig ring bases and some things, mainly the pinecones, have been wired on to hold them still.


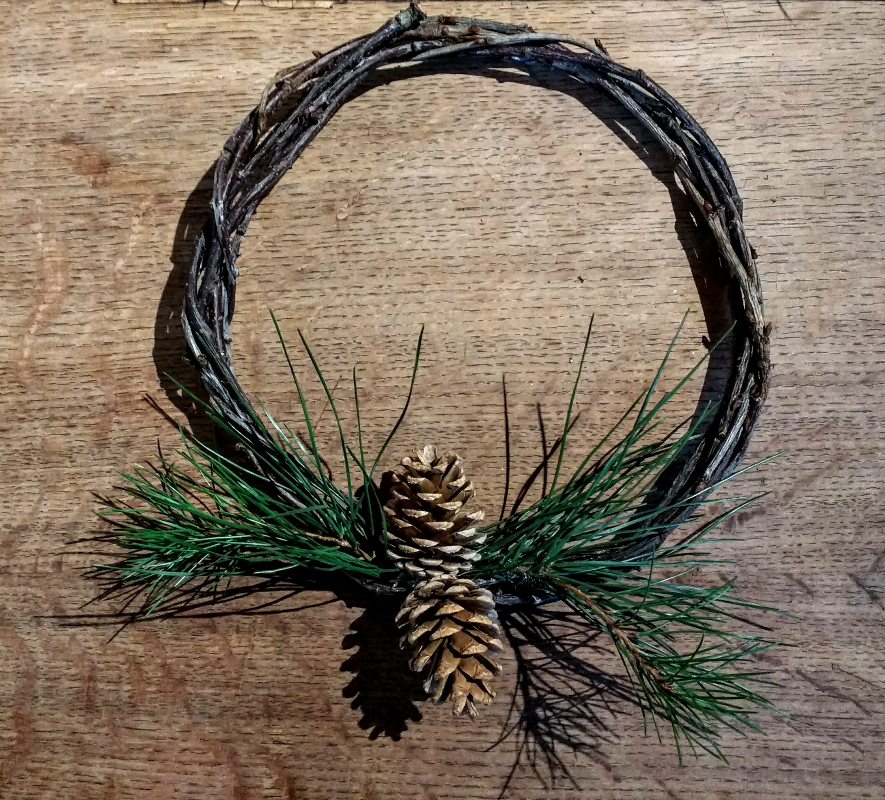
I have also made a few very simple ones to add to the back of some of our internal doors, as you can see I have woven in a small piece of pine and stuck a couple of pinecones on with a hot glue gun. I'm not sure yet whether to add a little snow spray.

These ring bases can be decorated as elaborate or as simply as you choose and the bases can be kept and used year after year with a new decor each time. Very simple, very quick and very thrifty.


Wednesday, 29 November 2017

Pine Cone Garland

I recently posted some photographs of our pine cone garlands on social media and was inundated with questions on how to make these and many people commented on how beautiful the finished garlands looked. So I have decided to post a little guide on our very thrifty and natural Autumn, Yule or Christmas garland decorations.


My husband and I decided over 12 years ago that we would embrace thrifty living... no more shop bought decorations for us!!... Everything we wanted we would make as thriftily as possible. Not only has this saved us so much money, unpacking our lovingly, handmade Christmas decorations every year holds so many memories.

I absolutely love the simplicity and natural beauty of these pine cone garlands, the one above was made for Autumn but I also have one that was made for Christmas a few years ago which has a few more sparkles.


First you will need to collect some pine cones, we usually grab a few throughout the year as we find them. The amount of pine cones you need will depend on the length of garland required, I'm using seven for my mantle piece. I usually leave them outside for a little while to ensure that any critters safely leave the pine cones.


To make the fixings we are using screw eyelets, they are really cheap only a few pence for a bag. I have managed to screw these directly into the end of the pine cone by hand but it is a little fiddly, so if you need help starting your hole, a very thin drill bit may give you a start.


 Next just thread your pine cones onto your chosen string or ribbon, we are using natural jute string here but ribbons work just as well and there is less movement of the pine cones. You may notice if using string that all the pine cones slip to the middle when you try to create a swag in your garland, you could tie them on to keep them still... but I have another remedy for this...


A little trick which allows you to easily fix them in place but still allows them to be movable if you need to change the position of a pine cone. Thread the string through your eyelet and then thread it through again, as seen in the above photo... so you create a loop.


This simple act gives your pine cone a little more resistance so that you can move it but it doesn't slip down the string.

These garlands can be kept natural or decorated for Christmas with a little glitter, paint or fake snow... the best part is it has literally taken a few minutes and cost a few pennies to make, and this beautiful garland can be reused every year.

Friday, 17 June 2016

Handmade Mouse Mat

Father's day is fast approaching and the children like nothing better than to make gifts as little extras for their wonderful father. This year we decided to make a sturdy mouse mat as the ones we have keep getting mysteriously peeled and we have to constantly replace them.


Firstly, finish peeling the top layer from the mouse mat if you need to, as we have chosen to reuse the rubber bottom layer for this very simple craft. Next choose your top layer and test out the fabric to see if your mouse works well on the surface. I have decided to use a faux leather as this mouse mat is for father's day but any scraps of leather or thick fabric would work well. You could even use a fabric that had a photograph printed on it if you wanted a personal touch.


Cut out a rough shape slightly large than your mouse mat as it's easier to cut it to the exact size after glueing. If using a porous fabric you may want to test a small patch to see how the glue dries before starting your mat.


We have used a latex based glue for this project to give a better flexibility. Paste a small amount of glue to each side you want to stick and wait a few seconds to allow to go tacky.


Stick both sides together, ensure there are no creases and press down firmly, then allow to dry completely.


We left ours to dry for a few hours underneath some very heavy books, this ensures your mouse mat dries totally flat and has no lumps, bumps or creases in.


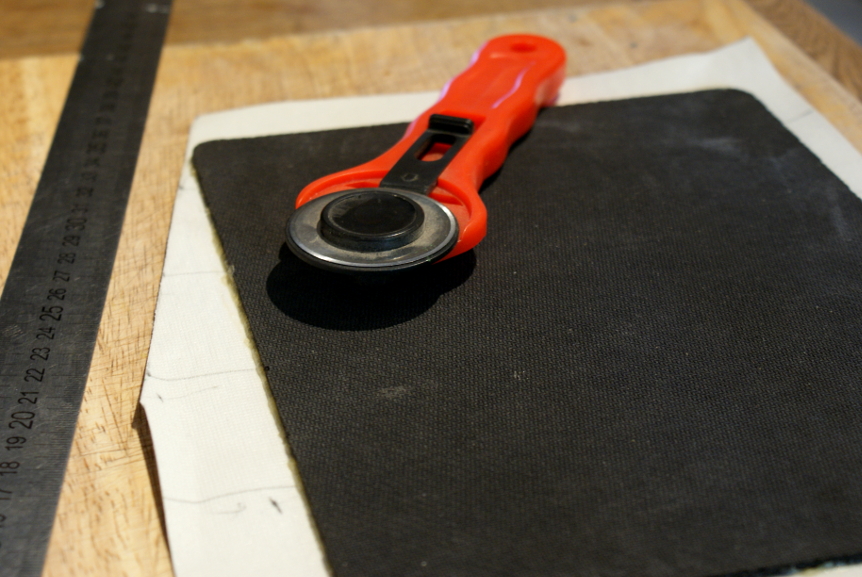
After the mouse mat is dry you can cut around the edges as neatly as possible also ensuring the corners are rounded. Scissors or a craft knife will work well but we have used a rotary cutter as this cuts fabric very neatly with one quick motion.


As you can see the completed mouse mat is now taking shape, the faux leather has given the mat a very professional look. It will look perfect on any father's desk either at home in the study or in his work office.


There we go all finished, the mouse works perfectly and because it is much stronger than the ones we usually buy it shouldn't suffer from peeling any more.


If you would like to personalise your mouse mat further you could emboss it or try out some metallic permanent markers and a quick spray of lacquer to ensure it doesn't come off. It may be best to add details to a top corner so that it doesn't interfere with the mouse functions in any way.


Tuesday, 12 January 2016

Happy New Year 2016

Just a quick post to wish you all a belated Happy New Year, give you a quick update on a few of our activities coming up to the Christmas season and to post a photograph of the handmade gifts I made for my children this year.


 I usually crochet the children an extra gift to add into their Christmas stockings but this year I decided to get out my sewing machine and surprise them with a soft character toy each from their favourite computer game or cartoon. I made my son an Enderman from Minecraft and my daughter a Lumpy space princess from adventure time. They certainly got more than a few squeals of delight on Christmas morning.


Just before Christmas we went to the Harry Potter Warner Brother studio tour and had an absolutely wonderful time. We got to see the Hogwarts Express which arrived earlier in the year and had the pleasure of seeing Hogwarts in the snow with all the sets decorated for Christmas. An amazing day for adults and children alike!


We also took advantage of the last sunny days of the year to go beach combing on a nearly deserted beach and had a picnic by the sea. Using some of the time to clear a bag of rubbish from the shoreline as we usually do.


To finish the day we visited the local sea life centre, a perfect way to relax in the lead up to the Christmas season.


So as you can see we are still here and I hope to be resurrecting this blog, adding more crafts, science and other learning projects with an added taste of our lifestyle too... Happy New Year from our whole family at Lightly Enchanted.

Saturday, 29 June 2013

Seed Bombs

We have just had our 4th wedding anniversary and every year my husband and I try to make each other a gift based on the traditional gift guide. For the 4th anniversary the gift should be fruit or flowers, a little difficult to make... so we had to be a little creative.

As our love is so strong and very special and we both have a strong love of the natural world, I thought I would make a gift for my husband that would share the beauty of our love with the world... with nature. So I made him some seed bombs as these will grow into flowers.


These are so very simple to make... I just mixed a handful of compost with some wildflower seeds from our local area in a bowl, sprinkled in a little powdered clay and a few drops of water. Once mixed well I spooned the mixture into a heart shaped ice cube tray and left to dry.

When these are planted little pockets of wildflowers should spring up in bare patches giving a little extra help to our ailing bee population.


If this gift just feeds one bee or makes one person smile as they walk past we will have made a difference to this world, albeit a very small one.

Well that's my gift to my wonderful husband this year... Happy Anniversary. 


Wednesday, 31 October 2012

Happy Halloween

Just a short post to wish you all a Happy Halloween / Blessed Samhain and show you a few of the things we have been doing. We have brought in our Halloween tree, this is usually made from some spooky looking sticks which the children decorate.


I had to squeeze it on the window ledge between our ginger and turmeric plants that we have been growing. It looked a little sparse so we thought we would make a few extra decorations, one of these was a twig star.


As you can see in the photograph these are very easy to make, I have used some small twigs saved from when my husband pruned a shrub recently and copper wire. Any wire or string would do, I have used copper wire as we seem to have loads of it about, my husband saves it from broken appliances to use in craft projects. If you are interested in salvaging your own copper wire you can read about it at the bottom of this post.


The twigs are just tied in the shape of a star and hung on a piece of thread onto the Halloween tree. We also made some ghostly cupcakes.... my daughter thought they looked really cute. We added blueberries to our cake mixture to represent 'eye of newt' and desiccated coconut for 'bat toe nail clippings'. The ghost shape is just formed from icing. Very tasty.


We have been really busy and my husband has been doing some crafts too for Mexico's day of the dead (Día de los Muertos),  If you would like to see his sugar skulls, cupcakes and pumpkins you can read here. They look really cool.


Saturday, 7 April 2012

Melted Fabric Flowers

Over the Winter I have been trying out a few crafts and I thought I would share a couple of photographs here with you quickly. Melted fabric flowers are something I have been wanting to try for a few years, and kept putting off, but as it turns out they are quite simple.


I have cut out a few circles of man-made fabric decreasing in size towards the middle and snipped the edges where the petals should go. Then you slowly lower the edges towards a candle flame...I started quite high above the candle you will notice when the fabric starts to melt probably about 4 to 6 inches above the flame, you need a gentle approach here and never get low enough to touch the flame.

Man made fabric melts whereas natural fabric would probably burn, I took safety precautions here and had a bowl of water close by just in case but nothing has ever caught fire. As you can see in the photo when the edges melt they curl inward like flower petals. I have stacked together a few colours and glued beads in the center to give the flower an anemone look.


I used one of the flowers on this hand made card for my daughter. I also sewed one on the crochet hat I made for my youngest daughter.


This hat was very simply worked without a pattern just increasing from a ring until it was the right size. I made the flower to go on the side of the hat as seen in the above photo but my daughter had other ideas and always wore it on the front of her head like a little mini pink Dalek.