Showing posts with label lanterns. Show all posts

Saturday, 26 January 2013

Happy New Year

I know it's a belated Happy New Year as I have been taking some much needed time off to spend with my family, but I thought I would send you all good wishes for this year and share some of the things we made over the Yule season.

As we had been studying life on the home front during WWII, we thought it would be nice to try and hand make some of the small stocking presents for the children. During the war many children received home made gifts at Christmas time and we thought this would make a change from the usual gifts. My husband made some beautifully turned spinning tops and cup and ball sets and I thought I would have a go at amigurumi, a sort of miniature crochet toy.


There are many patterns online but I had a huge problem following them and in the end I gave up and made up my own simply based on the style of a hat I made for my daughter last year. Not bad really for a first attempt, I have tried to give the little monsters a character matching one of the children's interests. A little ballerina and an alien, I had plans for more things but totally ran out of time.


We even made Christmas gifts for the cat, he has a little felt bird on a stick complete with feathers and catnip.

It has been very cold here the last couple of weeks and the children have spent a lot of time playing in the snow, they have also conducted so many experiments I have lost count. It has been cold enough to freeze the water in the chicken feeder on a daily basis, giving us beautiful ice bowls which have been saved in the freezer to be used as lanterns.


This is the smallest one with a candle inside, so beautiful... definitely worth saving. I hope you are all having as interesting start to the new year as we are.


Wednesday, 9 November 2011

Autumn Tea light holders

Just a quick post to show you some of the themed tea light holders we made this Autumn, which would look lovely at any bonfire or fireworks party. If you are a regular reader you may remember we made our tea light holders from old recycled jars earlier in the year, if you need to recap on how to put the wire on the top you can find them here.


We have two small schumacher trees in the garden and we waited for the leaves to change colour to make the bonfire picture I wrote about yesterday. With the leaves left over from the children's crafts we glued some on a couple of jars, any leaves can be used last year we used maple leaves and earlier in the year we used leaf skeletons. The schumacher  leaves have the appearance of flames and the beautiful glow they give off when lit make a lovely Autumn addition to any garden.


Here they are after dark, I think they look quite magical like little tiny bonfires. We made these as temporary lanterns for Autumn, and are hoping to make more seasonal ones in the future. If you would like to preserve the leaves and make this autumnal lantern last a little longer you could totally cover the leaves in craft glue or modge podge to seal them in.


Inspire Me Beautiful

Tuesday, 7 June 2011

Tea light holders

It is coming up to the summer solstice / midsummer / Litha, it's celebrated on the 21st June and is the longest day of the year, so we thought we would make some Tea light holders from old, recycled jars to use in the garden. In the lovely summer evenings these lanterns look very pretty hanging from branches, and give the garden a magical touch.


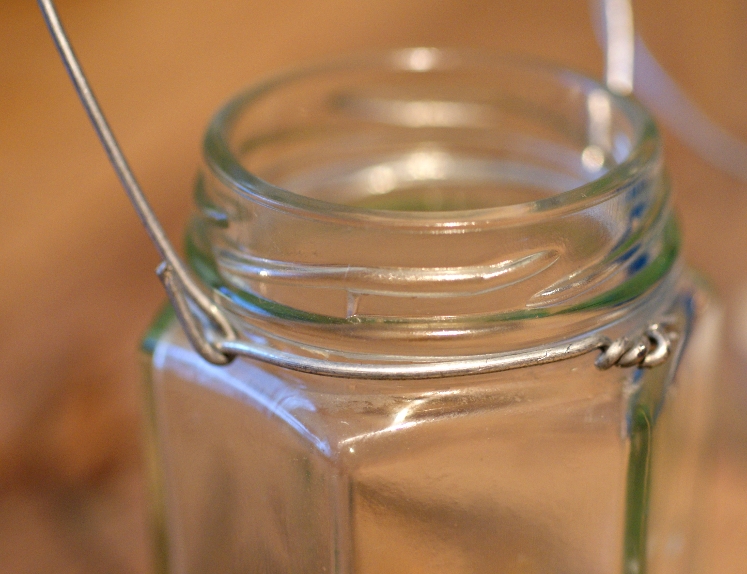
This craft can very easily be done by children, but it does require that an adult first makes the handle from wire if the children are very small. The wire handles above were twisted by my husband and he has used various methods and wires to do this.


This one is the simplest one, the wire has been wound round the top of the jar, twisted together and then the handle has been looped through and bent up.


This one has had a loop incorporated into wire each side of the jar and then wound round and fastened off. The handle has then been added as shown above.


This handle on this jar has been made by twisting the thin copper wire salvaged from a coil in the back of an old computer power supply. So choose your method of fixing and type of wire and once this part has been done anyone can decorate the lanterns, even small children or they can be left plain.


The blue jar has been sprayed with glass paint to give it this wonderfully deep colour and it is quite possible to use stencils to get a design on the jar but we have chosen to add star shaped sequins. We call this one 'the starry night lantern'.


Next we tried to make a lantern look like it was surrounded by fireflies, some have been stuck on the jar and some have been suspended on wire to give the illusion that they are flying around the flame. So this is 'the firefly lantern'.


We decided to leave the little hexagonal jar plain as the light reflects nicely and the last jar was decorated with leaf skeletons as you can see below. The photograph enlarges if you click on it, in case you need a closer look.


The decorations are purely personal choice and you could really go to town with this and be as ornate as you like,my daughter was considering jewels. This is a lovely way to recycle jars and they make a nice touch to the garden.


This is the starry night lantern hanging in my willow tree in the grotto, looks lovely all lit up but my photographs after dark did not come out too well. If you are hanging the lanterns please be sure you do it safely, make sure they can't be knocked down and smashed, or that pieces of the tree will not catch fire.


The lanterns after dark look really quite beautiful and definitely add a touch of magic and a hint of romance.

Monday, 28 February 2011

Charity shop finds

For this weeks magpie Monday charity shop post I thought I'd start with the replica copper ship lanterns we found in a charity shop for £3.99 last week, my husband loved them instantly. They hold tea light candles at the moment which would look quite atmospheric on the patio for outdoor eating on a summer evening but my husband has been wondering whether he can convert them to run off solar power.


Next as my little ones are important too, I thought I would show you a couple of the things that they have found. This train set cost cost us £1.75 it is a fisher price geotrax set, normally very expensive, we took a bit of a chance because we didn't know it worked but luckily after putting it together everything works. There are more parts than you can see in the photograph but they only built a small track today, hours of fun!


We found this wooden doll's cradle for £3.00, it needs a small repair to the rocker at the bottom and a re paint but the work will be worth it and will keep my husband busy. This is so sturdy that my children can sit in it, perfect for my daughter.


I also bought some circular knitting needles, two pairs for 25p bargain price, not really sure how much these cost in the shops nowadays but they can't be as cheap as that!


 this post will be linked as a magpie monday post on the blog me and my shadow by missielizzie.

Friday, 21 January 2011

Chinese New Year Lanterns

Chinese new year of the rabbit starts on February 3rd, we are planning more than one craft and hoping to learn more about the Chinese celebration so we are getting an early start again. This first craft activity is aimed at very small children, it is a very simple craft and I'm hoping to get my kids glitter lust out of the way.


Every one has made these lanterns before but I'll briefly explain as I go along in case you have forgotten. First fold your A4 sheet of red paper in half length ways and cut strips almost to the edge as seen above. open out and let the kids go to town decorating, I tried to get them to keep to red and gold mostly to keep the lantern looking Chinese. We glued tissue paper strips along one edge to act as like tails and rolled the paper up, stapled the edges together and also attached the handle.


This is the finished lantern, the children made one each and they are now hanging up on the door as a decoration for the new year celebration.


Of course they had to spend some time running around with the lanterns flying behind them like kites so I am lucky they are still in one piece.


                                                 Happy New Year China for February 3rd

Saturday, 30 October 2010

More Halloween Preparation


My husband carved the pumpkins today, as you can see above, what do you think?... scary enough? He tries to carve a different face every year and I think he's rather good at it. Last year he did Jack Skellington, he also likes to carve something in the back so that you get the shape projected onto the wall behind, this year he did bats. A little added magic for the children. With two pumpkins there is a lot of pumpkin insides to be removed, and we like to make use of as much as possible. I started off by collecting all the seeds and tossed them in a little oil, salt, pepper and cajun spices, these were then roasted for us to snack on.


The pumpkin flesh that was scraped out we have divided in half. One half I've kept to make soup, the other I've cooked and made into a puree to use to cook other things with. Today we made pumpkin pie, or should I say pies, as the recipe we used had very big portions.


This was really nice and as there are two pies we will be eating it again tomorrow. The children have been enjoying all the Halloween preparations, especially all the crafts.


They have made this banner, I wanted to make a fabric one to keep forever but ran out of time so they have made the banner using Halloween shapes, colouring them in and sticking the pumpkin faces on. So today has been another very busy day full of baking and crafting.

Bats and Lanterns.


   More Halloween crafts, this time we have decided to make lanterns in the style of the sleepy hollow ones, only much more child friendly. The lamp on the left is a faerie lantern that my children bought for me (we didn't make this one) the one on the right is the one we made. we chose some stiff black board and made sure it would fix around a jar. Using a jar ensures that your cardboard doesn't burn and your tea light candle is held safely. We cut out our Halloween picture from the card and fixed a piece of tissue paper to the rear of the cut out shapes. Orange in this case to match the pumpkins waiting to be carved.


  Once this is completed you can roll your cardboard into a cylinder and fix it, we just used tape. then put your cylinder over the jar with the tea light inside. wait until after dark and light the candle. This will definitely wow the children and provide a spooky atmosphere.  A really eye catching lantern for our display. We will be keeping ours out of reach of our youngest children for candle safety reasons.


    I really love bats and no Halloween display is complete without bats, the above bats were very, very simple to make. We love to recycle as much as we can so we cut the bat shapes out from the crinkly black paper covering that comes in chocolate boxes. this gives them a slight 3D look and they make a crinkly noise when you touch them. Once cut out, the children stuck little sequins on for eyes so that they catch the light... added spookiness. Then they were hung onto a hanger using fishing line and left in a doorway to brush against the face of an unsuspecting passer by.


   We had some bats left over and didn't want them to go to waste so these were positioned on the wall as if they were just flying past. So as you can see we have been really busy, these are just a sample of the things the children have been making.

Thursday, 28 October 2010

Spider webs for Halloween


 Halloween / Samhain is one of my favourite holidays, I love how spooky the house looks with broomsticks propped up by the front door and witches hats hanging on the hat pegs in the hallway. All cobwebs in the house get a reprieve for a few days and the smell of pumpkin lanterns wafts through every room.

    The children have been really busy crafting scary things for Halloween, we have had to find crafts suitable for a 2 year old to join in because she absolutely loves everything crafty the messier the better. Yesterday we made cobwebs with great, big hairy spiders in them. Do you think they look spooky or just rather cute?


    We have used conkers to hold the wooden skewers in place as we have many hanging around thanks to our Autumn collecting, but you could also use large crafting polystyrene balls, clay or indeed anything round you can find. Then the conker was covered in glue and rolled in wool that has been cut up very small so that it was all fuzzy. Pipe cleaner legs were added and googly eyes. The web part was very simple to make as you can see, it is easy to wind wool around the skewers. This does tend to slip a bit if played with too much, so some discrete dots of glue would hold this in place if you choose to.


 They are now ready to hang up on the wall to scare people for Halloween. My husband also helped our son to make a PVA glue cobweb. He drew out the web shape in glue on a laminate sheet and left it to dry overnight. Once dry it could be peeled off the laminate sheet, and stuck on a window. The thinner you can get the web the better here as it tends to spread out a little, but it looks very effective.