Lots of exciting news since the last chicken post, we had our first egg on march 16th from Ginger much earlier than we expected. So that was a big surprise not only to us but also to the chicken who was caught short and laid it in the middle of her run with a very confused look on her face.
The egg on the bottom is our first egg from Ginger, the egg on the top is for size comparison, it is a medium free range egg and only slightly larger. It was about a week later we started getting eggs from Dotty, then another week after that that Zelda joined in, rather dramatically as her first two eggs came just an hour apart with no shells.
This was a few days worth of eggs at the beginning of April, as you can see a different size and colour from each chicken, very handy for recipes requiring different sizes and the children love to pick out the egg they want for lunch. The chickens have changed quite a lot too, their combs and wattles have grown as has their tameness.
This is dotty now, she lays the caramel brown speckled eggs and loves to sit next to you on the garden bench especially if you have food.
This is an updated photograph of Ginger, layer of the first egg, she lays quite large medium brown eggs and is quite vocal.
This is what Zelda looks like now, she lays the light creamy coloured eggs. She is 'the boss' chicken and a regular escapologist, my husband has had to raise the height of the run several times. When she escapes she usually just digs for worms and grubs in the veg beds, although once she was caught eating the cabbages.
This is a very common view of the chickens, always digging about. They are currently watching my husband making some changes to keep Zelda in.
The chickens are very curious creatures, what ever you do in the garden, they are right there with you especially if you are digging or weeding. As soon as they hear the back door open they come running up to greet you, or should I say frisk you for food.
The children have been having the time of their lives spending time with the chickens and can often be found in fits of giggles, worm in hand being chased round the garden by three chickens. This has also been very educational for them and they have learnt many new things, one of their favourite jobs is collecting the eggs while they are still warm.
We now get three eggs every single morning and got a very large surprise the other day as you can see above. The egg was huge and weighed almost double that of some of the other eggs, it was laid by Dotty and turned out to have a double yolk.
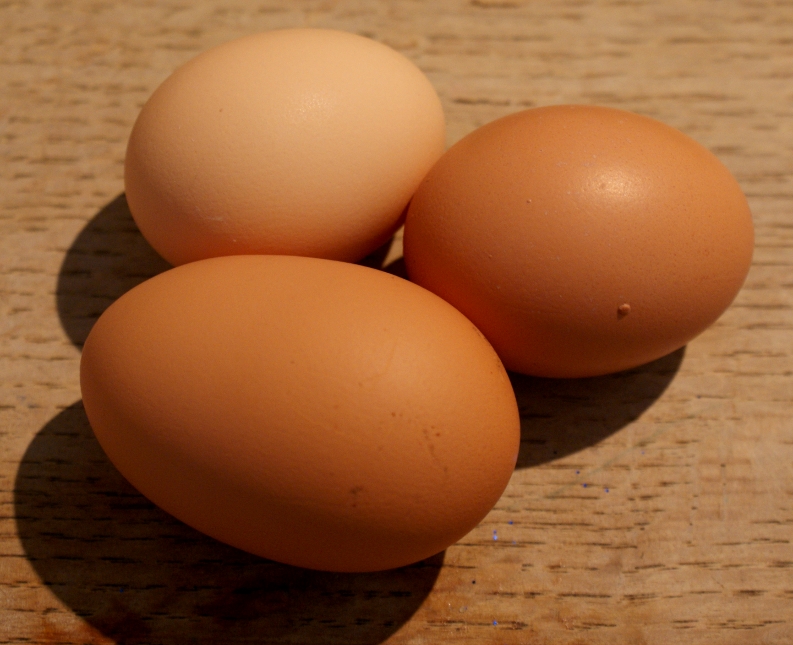
Here is another picture of the large egg next to two of the other eggs I had in the egg box. We are all enjoying being chicken keepers and especially loving our three little feathered friends at the bottom of the garden.
A thrifty and natural life...full of magical crafts, money saving tips and home educating along the way.
Friday, 13 April 2012
Saturday, 7 April 2012
Melted Fabric Flowers
Over the Winter I have been trying out a few crafts and I thought I would share a couple of photographs here with you quickly. Melted fabric flowers are something I have been wanting to try for a few years, and kept putting off, but as it turns out they are quite simple.
I have cut out a few circles of man-made fabric decreasing in size towards the middle and snipped the edges where the petals should go. Then you slowly lower the edges towards a candle flame...I started quite high above the candle you will notice when the fabric starts to melt probably about 4 to 6 inches above the flame, you need a gentle approach here and never get low enough to touch the flame.
Man made fabric melts whereas natural fabric would probably burn, I took safety precautions here and had a bowl of water close by just in case but nothing has ever caught fire. As you can see in the photo when the edges melt they curl inward like flower petals. I have stacked together a few colours and glued beads in the center to give the flower an anemone look.
I used one of the flowers on this hand made card for my daughter. I also sewed one on the crochet hat I made for my youngest daughter.
This hat was very simply worked without a pattern just increasing from a ring until it was the right size. I made the flower to go on the side of the hat as seen in the above photo but my daughter had other ideas and always wore it on the front of her head like a little mini pink Dalek.
I have cut out a few circles of man-made fabric decreasing in size towards the middle and snipped the edges where the petals should go. Then you slowly lower the edges towards a candle flame...I started quite high above the candle you will notice when the fabric starts to melt probably about 4 to 6 inches above the flame, you need a gentle approach here and never get low enough to touch the flame.
Man made fabric melts whereas natural fabric would probably burn, I took safety precautions here and had a bowl of water close by just in case but nothing has ever caught fire. As you can see in the photo when the edges melt they curl inward like flower petals. I have stacked together a few colours and glued beads in the center to give the flower an anemone look.
I used one of the flowers on this hand made card for my daughter. I also sewed one on the crochet hat I made for my youngest daughter.
This hat was very simply worked without a pattern just increasing from a ring until it was the right size. I made the flower to go on the side of the hat as seen in the above photo but my daughter had other ideas and always wore it on the front of her head like a little mini pink Dalek.
Wednesday, 14 March 2012
Home made Toothpaste
Trying to get rid of as many chemicals as possible from our daily life has led me to give home made toothpaste a go. I researched many recipes online, searching for all the pros and cons, looking for the simplest ingredients with the most benefits and found this one works best for us.
These are the four ingredients I have gone with, most of the recipes I have seen start with equal amounts of bicarbonate of soda and coconut oil. so, if you use one tablespoon of coconut oil you will need one tablespoon of bicarbonate of soda and mix together. Bicarbonate of soda is also used in conventional toothpaste for the cleaning abilities it has and coconut oil, from what I have read, is anti bacterial, anti fungal and has some tooth and gum benefits.
This is what it looks like after mixing, at this point we added a teaspoon of ground xylitol to make it slightly sweeter but this is optional really and either a few drops of peppermint oil or extract of peppermint. Some recipes use stevia instead of xylitol, both come naturally from plants and both have some benefits. This makes a firm toothpaste and the consistency depends a lot on the temperature in the house due to the coconut oil.
Then store, at first I used the little pots you can see above as I only made up a small amount but having decided we really like it and intend to keep using it I have now made it in a larger quantity so it is being stored in a small mason/kilner jar. Due to sensory problems I have never really liked the way conventional toothpaste foams up in your mouth and this home made toothpaste doesn't foam at all. I have also found the taste mellows slightly after the first day, it was a little zingy the first day I made it.
** If you have been thinking about doing something similar, I would recommend researching both the ingredients in conventional toothpaste and the many home made recipes out there.
These are the four ingredients I have gone with, most of the recipes I have seen start with equal amounts of bicarbonate of soda and coconut oil. so, if you use one tablespoon of coconut oil you will need one tablespoon of bicarbonate of soda and mix together. Bicarbonate of soda is also used in conventional toothpaste for the cleaning abilities it has and coconut oil, from what I have read, is anti bacterial, anti fungal and has some tooth and gum benefits.
This is what it looks like after mixing, at this point we added a teaspoon of ground xylitol to make it slightly sweeter but this is optional really and either a few drops of peppermint oil or extract of peppermint. Some recipes use stevia instead of xylitol, both come naturally from plants and both have some benefits. This makes a firm toothpaste and the consistency depends a lot on the temperature in the house due to the coconut oil.
Then store, at first I used the little pots you can see above as I only made up a small amount but having decided we really like it and intend to keep using it I have now made it in a larger quantity so it is being stored in a small mason/kilner jar. Due to sensory problems I have never really liked the way conventional toothpaste foams up in your mouth and this home made toothpaste doesn't foam at all. I have also found the taste mellows slightly after the first day, it was a little zingy the first day I made it.
** If you have been thinking about doing something similar, I would recommend researching both the ingredients in conventional toothpaste and the many home made recipes out there.
Saturday, 3 March 2012
New Arrivals
We have wanted some chickens for a few years now and finally this week saw this dream come true when we welcomed three young chickens into our family and I thought I would introduce you to them here. My husband managed to build the coop from some new pallets he was given you can read about it here if you want to, he is currently making some minor adjustments to make the run area larger, although they will be spending some time free range in the garden.
This is a photograph my eldest daughter's boyfriend took of our girls just after they arrived, I think they are wondering what is going on and are just as curious about us as we are about them. Firstly I'll introduce you to my youngest daughter's favourite one, she has named her 'Ginger', she is an amber ranger and the smallest of the three.
My eldest daughter and my son both like our largest chicken best, she is a bluebelle and my son has chosen to call her 'Zelda', she is quite bossy with the other chickens but a little shy with us.
The last one is our speckledy hen, according to the children this one is mine to name so say hello to 'Dotty', she is the bravest one and was taking corn from our hands the very next day.
We have only had them a couple of days and already they just seem to fit right in, the children appear to be new 'chicken experts' and my youngest daughter calls them 'her girls'. I will never forget the squeals of delight when she found that they would take corn from her hand and it was soon declared 'the best day ever'.
They are point of lay chickens, which means they are young and haven't started laying eggs yet, we have a few weeks to wait until that happens, so there is enough time for us all to get to know each other better. Really cannot wait to see how excited the children are when the first egg arrives, much squealing I expect!
Here is our self appointed chicken guardian, although I suspect he is only here to sun himself as he did not look too impressed with the very large birds that are now at the bottom of the garden and has been keeping his distance. Well, that was our exciting news this week, will keep you posted when the first egg arrives.
This is a photograph my eldest daughter's boyfriend took of our girls just after they arrived, I think they are wondering what is going on and are just as curious about us as we are about them. Firstly I'll introduce you to my youngest daughter's favourite one, she has named her 'Ginger', she is an amber ranger and the smallest of the three.
| Ginger |
| Zelda |
| Dotty |
| Dotty |
Here is our self appointed chicken guardian, although I suspect he is only here to sun himself as he did not look too impressed with the very large birds that are now at the bottom of the garden and has been keeping his distance. Well, that was our exciting news this week, will keep you posted when the first egg arrives.
Friday, 17 February 2012
wire bending
Recently when we were experimenting with the wire bending for the frame of the wooden hearts, I got a little carried away and decided to explore this project a little further, as you do. So began by twisting garden wire into a heart shape, very easy to do with thick gloves and a pair of pliers, I'm also thinking of doing spirals.
This is what I ended up with... it will be a plant support and I am going to be hanging something in the middle with the name of the seedling on but haven't quite got that far yet. As it has a rounded top you won't accidentally poke yourself in the eye whilst gardening either unlike normal canes.
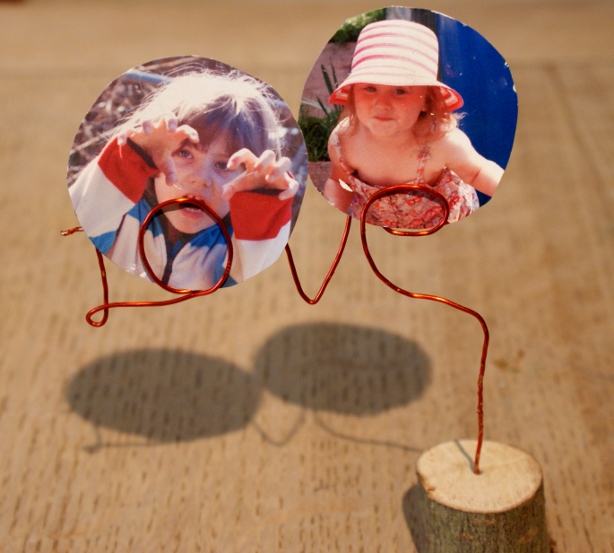
I also had a go at writing with wire as you can see above.... it's a bit shaky but it is definitely still readable... just about. I have used a much thinner, red wire for this and pushed the end into a small piece of wood so that it stands up alone and can be used as a quirky photograph or memo holder.
Although I am tempted to fix the wire to the top of our family pin board along with the two little photographs.
This is what I ended up with... it will be a plant support and I am going to be hanging something in the middle with the name of the seedling on but haven't quite got that far yet. As it has a rounded top you won't accidentally poke yourself in the eye whilst gardening either unlike normal canes.
I also had a go at writing with wire as you can see above.... it's a bit shaky but it is definitely still readable... just about. I have used a much thinner, red wire for this and pushed the end into a small piece of wood so that it stands up alone and can be used as a quirky photograph or memo holder.
Although I am tempted to fix the wire to the top of our family pin board along with the two little photographs.
Tuesday, 14 February 2012
First Sewing - Felt Heart
My youngest children have been asking quite a lot lately for me to teach them how to sew, knit and crochet. They are very young so I thought I would begin by making some threading cards so they could practice the actions of sewing before moving on to making the felt hearts with real needles.
As it was coming up to Valentine's day we made our threading cards out of red paper hearts which were then laminated. Any picture could be laminated for the budding sewing enthusiast, it could be something that sparks their interest or even a drawing of their own. If you don't have a way to laminate paper, any plastic or stiff card could be used like a box or a picture from an old board book. Holes were then punched all around the outside for the stitches.
Shoelaces would be the ideal thing to use for the stitches, the rigid ends make a good needle substitute but we didn't have any colourful ones to hand so we have used wool instead. I wound a piece of sticky tape around the end of the wool tightly to try to imitate the end of a shoelace and to make it stiff for easy threading. If you look at the end of the pink wool in the above picture you will see what I mean. They played around with these cards for a while, getting a feel for how the stitches looked and made many different patterns.
Then we moved on to the 'real sewing', a cookie cutter was used to draw the heart shapes in the felt and two hearts were cut out and put together for each child. Using quite large chunky needles and wool as thread, they both managed to do a simple running stitch all the way around the heart. Each heart was stuffed and had a piece of ribbon stitched to the top to finish off.
The children were so excited about this project and very pleased with the results, I have to say I love them as much as they do. A perfect first sewing project to keep forever, very simple and very beautiful.
They are now hanging in pride of place on our pin board for all to see.
As it was coming up to Valentine's day we made our threading cards out of red paper hearts which were then laminated. Any picture could be laminated for the budding sewing enthusiast, it could be something that sparks their interest or even a drawing of their own. If you don't have a way to laminate paper, any plastic or stiff card could be used like a box or a picture from an old board book. Holes were then punched all around the outside for the stitches.
Shoelaces would be the ideal thing to use for the stitches, the rigid ends make a good needle substitute but we didn't have any colourful ones to hand so we have used wool instead. I wound a piece of sticky tape around the end of the wool tightly to try to imitate the end of a shoelace and to make it stiff for easy threading. If you look at the end of the pink wool in the above picture you will see what I mean. They played around with these cards for a while, getting a feel for how the stitches looked and made many different patterns.
Then we moved on to the 'real sewing', a cookie cutter was used to draw the heart shapes in the felt and two hearts were cut out and put together for each child. Using quite large chunky needles and wool as thread, they both managed to do a simple running stitch all the way around the heart. Each heart was stuffed and had a piece of ribbon stitched to the top to finish off.
The children were so excited about this project and very pleased with the results, I have to say I love them as much as they do. A perfect first sewing project to keep forever, very simple and very beautiful.
They are now hanging in pride of place on our pin board for all to see.
Monday, 13 February 2012
Wooden Hearts
It is nearly Valentines day and we have been doing a few heart related crafts, many of these seem to involve sticks this year. This first heart was made with bendy twigs and copper wire, any wire or string would do here but if you are interested in getting some free copper wire from broken electrical things there is a guide here (you may need to scroll down).
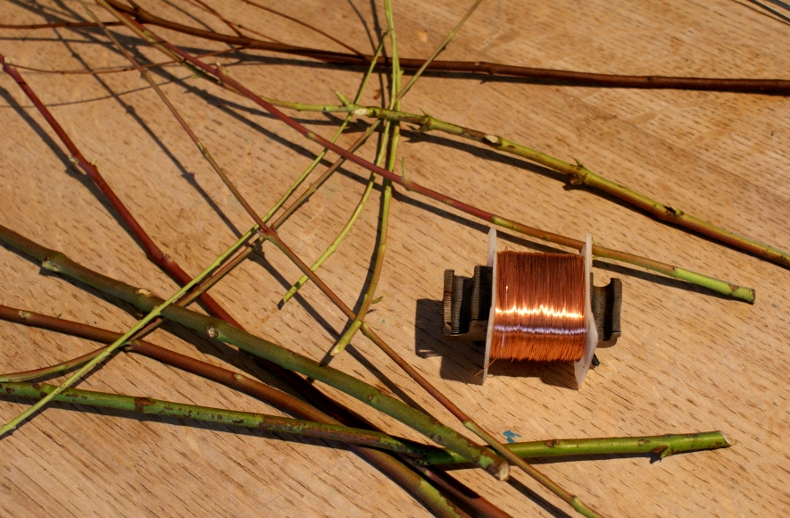
This photograph shows what I started with, first pick two large sticks and bend into a heart shape, wrapping the ends with the wire to get the basic shape.
Then to create the interior design, sticks were bent and wired in place where they touched another stick, I went for a swirly pattern.
To add a finishing touch I have wired some wooden beads into the pattern and added a hanging ribbon. Here it is hanging on the wall, although I may end up putting this in the garden as a tree hanging or small garden trellis, copper ages well outdoors and goes a lovely verdigris colour.
I also tried another heart using the sticks that were left over from drying eucalyptus leaves, these sticks had an interesting colour but were much harder to work with as they weren't very flexible.
This time I started by bending some garden wire to the shape of a heart and used a hot glue gun to stick small pieces of the twigs into the shape of the heart.
I haven't quite achieved the woven twig look that I was aiming for as the stick was very brittle but it is very simple to make. I also have to show you the wooden heart my husband made. It is gorgeous and you can see how he made it here.
That's it for now although I will be back soon to show you the hearts the children made.
Subscribe to:
Posts (Atom)