Friday, 24 June 2011

2nd anniversary


Today is our 2nd wedding anniversary, although we have been together a lot longer than this. So this is just a short post to wish my wonderful husband and true love of my life, a 'happy anniversary'.

We thought it would be fun to hand make presents for each other every year based on the traditional gift guide, this year is cotton and my husband made this beautiful piece of thread art for me.


We had recently been talking about thread or string art, which used to be popular in the 1970's, as I used to do this as a little girl with my grandfather. It is a beautiful gift to be surprised with and has a heart in the middle.


This is what I made for him, it is a photo frame covered in cotton fabric, which I then sealed. The little flower is made from a circle out of a very old, falling apart dictionary. The definition of love. I have also put in a photo from our wedding.


I had to include a photograph of this, an origami crane and say 'yay I did it' Last year on our first wedding anniversary (which was paper), my husband wrote me the most beautifully romantic poem (on paper) and one of the things I tried to make for him was this origami crane. Unfortunately those of you who have known me that long will remember I could not get the crane right and was quite disappointed... so this year I was determined to get it right and finally managed it... better late than never isn't it?

Monday, 20 June 2011

Paper Quilled Sun

I thought I would have another go at paper quilling, this time a sun for the summer solstice. We have already made tea light lanterns for the garden, so this will hang in the window and hopefully catch the sun.


First, I shredded a sheet of yellow card as you can see above, the quilling tool was made by my husband and If you would like to make one yourself I will put a link at the end of this post.


I made lots of different sized circles very simply by rolling the strips of card around the quilling tool, loosening slightly and sticking the end down at the required size. Some circles are made with the full length A4 strip and some with half a strip. They were then fixed with a spot of glue into a circle of card to give the body of the sun.


Then I made these shapes to go around the outside, I made the circle in the same way, loosened to the desired size and pinched one side of the circle. This gives you this tear drop or flame shape. Do enough of these to totally go around your sun.


Stick them at random orientations around the outside like the photograph above to finish the sun shape. After this I sprayed just a touch of gold paint on to the sun, not enough to cover the yellow but just enough to give a gold glow in the sun.


 A piece of gold thread was added to the top so that it could be hung in the window and I wanted to add a bell or some glass beads to the bottom but I couldn't find any so sequins have been added to catch the sun.


Here it is in the window, not a very sunny day but hopefully this will look lovely with the sun shining on it.

The link to the post for making your own quilling tool is here.


Sunday, 19 June 2011

Father's day frames

Just a quick post to wish my husband, the wonderful father of my children, a happy father's day. We usually give some homemade presents as well as bought ones on special occasions as the children love to make things. This year everything seems to keep creeping up on me so fast that I'm having trouble keeping up.


So this years craft is a very simple one, we saved a few jar lids from the tea light lanterns to use as frames and added magnets to the back of them. These automatically stick but if you want something more permanent, you could add a spot of hot glue. This leaves the inside of the jar lid for your photographs, we took some fun ones, printed them out and cut them to shape. Then just push into the lid, once added to the frames they can be stuck anywhere that a magnet will stick.


This photograph shows them on the refrigerator but they are ideal for my husband to stick up in his workshop. Last year we made large hand print posters with the messy little hand print poem on and my son painted a rock with the words 'dad rocks' on it you can find a picture here.

Tuesday, 7 June 2011

Tea light holders

It is coming up to the summer solstice / midsummer / Litha, it's celebrated on the 21st June and is the longest day of the year, so we thought we would make some Tea light holders from old, recycled jars to use in the garden. In the lovely summer evenings these lanterns look very pretty hanging from branches, and give the garden a magical touch.


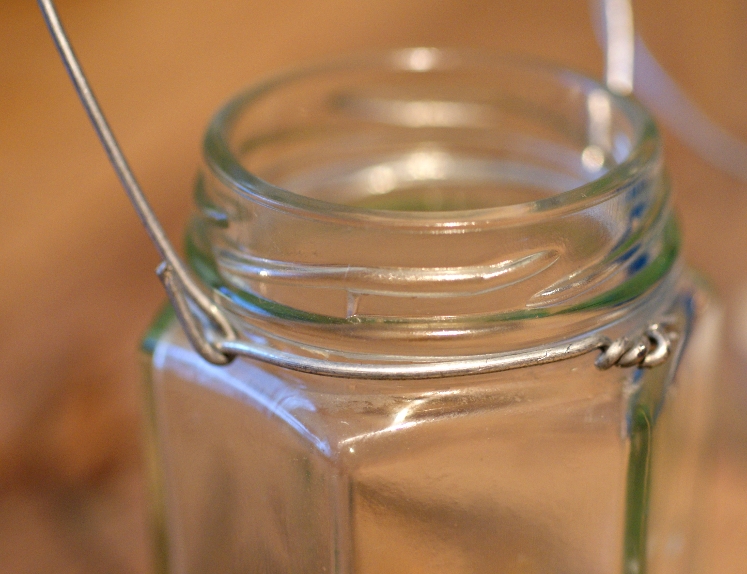
This craft can very easily be done by children, but it does require that an adult first makes the handle from wire if the children are very small. The wire handles above were twisted by my husband and he has used various methods and wires to do this.


This one is the simplest one, the wire has been wound round the top of the jar, twisted together and then the handle has been looped through and bent up.


This one has had a loop incorporated into wire each side of the jar and then wound round and fastened off. The handle has then been added as shown above.


This handle on this jar has been made by twisting the thin copper wire salvaged from a coil in the back of an old computer power supply. So choose your method of fixing and type of wire and once this part has been done anyone can decorate the lanterns, even small children or they can be left plain.


The blue jar has been sprayed with glass paint to give it this wonderfully deep colour and it is quite possible to use stencils to get a design on the jar but we have chosen to add star shaped sequins. We call this one 'the starry night lantern'.


Next we tried to make a lantern look like it was surrounded by fireflies, some have been stuck on the jar and some have been suspended on wire to give the illusion that they are flying around the flame. So this is 'the firefly lantern'.


We decided to leave the little hexagonal jar plain as the light reflects nicely and the last jar was decorated with leaf skeletons as you can see below. The photograph enlarges if you click on it, in case you need a closer look.


The decorations are purely personal choice and you could really go to town with this and be as ornate as you like,my daughter was considering jewels. This is a lovely way to recycle jars and they make a nice touch to the garden.


This is the starry night lantern hanging in my willow tree in the grotto, looks lovely all lit up but my photographs after dark did not come out too well. If you are hanging the lanterns please be sure you do it safely, make sure they can't be knocked down and smashed, or that pieces of the tree will not catch fire.


The lanterns after dark look really quite beautiful and definitely add a touch of magic and a hint of romance.

Monday, 30 May 2011

Charity shop glassware

For todays Magpie Monday post I thought I would show you some of the glassware we have bought from charity shops all of which is in everyday use here. To start with here is my trifle bowl, I love this bowl it is slightly frosted and has a wheat pattern and it says 'France' on the bottom. The photographs do not really do justice to the glassware, it is much prettier in real life and this cost just 10p from an odds and ends box!


Next are these pressed glass ice cream dishes, (that's what we use them for anyway), from the same odds and ends box for 10p each. There were only five of these and we have since broken one of them but they make the children feel very special when eating their ice cream, so worth every penny.


Last item from the odds and ends box today is this shaker, it is about 4 inches high and we tend to use it for sprinkling icing sugar or cocoa powder also 10p.


Something a little more colourful now, this turquoise blue glass bowl was only 35p, I'm not really sure of it's original use but we use it under a plant pot on the hall stand or sometimes to hold a group of candles. It is a very beautiful colour.


I've managed to pick up a few bottles over the years which are used for various things, mostly to hold the small flowers my daughter accidentally picks whilst smelling them! The one on the left says 'kutnow's powder' and is a lovely blue colour, the middle one has 'eiffel tower lemonade' on the front. These were 50p and 25p, the last one was free as it was dug up.


Finally today is this black glass perfume bottle, my husband bought me this for 75p mainly so that we could use the atomizer on another bottle. I have a lovely glass dressing table set but the atomizer on the perfume bottle was missing, so he had the idea of using this one. As yet though I haven't changed it over as this black glass one looks pretty on the bedroom shelf next to the ostrich feather fan.


I seem to have quite a few perfume bottles... That's it for today then this post is for the magpie Monday link up, please feel free to wander over there for more charity shop finds.

Me and My Shadow

Sunday, 29 May 2011

Wild and Free running.

As you may remember from previous posts, I recycled all my daughter's jeans into shorts for the summer to get extra wear from them as they would never be big enough for her next year. So we had to buy more jeans... which is something we did not find very easy at all. Everywhere we looked only had skinny fit jeans... these maybe in fashion but for my 2 year old, they are not something she wants to wear as she finds them far too restrictive, and there really should be much more choice for the active toddler.

So we were faced with a challenge to find her some looser fitting jeans that she liked and she could move freely in! As we are fond of recycling things, I had a quick rummage through the bags of clothing that I had put aside as it was no longer a good fit and found some of my sons old jeans. He is a little older than my daughter, so I decided to merge a pair of his with a pair of her old ones.


This is the first step we have added the pink scarf belt from my daughters old jeans to my sons old pair. My daughter loved this belt and she loves pretty embroidery on jeans too so this leads to my next step.


We cut the embroidered flower motive from her old jeans and stitched it to the new jeans with contrasting cotton. This however could be done much easier with special stuff for iron on patches.


These then are the finished jeans... very simple, strong, loose fitting and with a little touch of the things my daughter loves... We call them 'Big Brother Jeans' and best of all they were free, just took a little time, a few adjustments and she loves them... perfect for garden play.


Here they are on, 'what do you think?' perfect jeans for a little girl who loves to run wild and free through fields and explore the woods and climb trees with no restrictions.


Plenty of room for cartwheels and other tumbles.


Dancing too!


Crawling  and rolling in the dirt!


and even sliding down steps. My daughter is a very 'spirited young lady' and being able to move her legs freely and to have the most fun is very high up on her list of priorities.

To have a CHOICE of different styles of jeans would be lovely but just to let you know we will NOT buy clothing just because it was the only thing available! We are also saving more of my sons old jeans to try and decorate them with fabric paints in the future, another fun project.


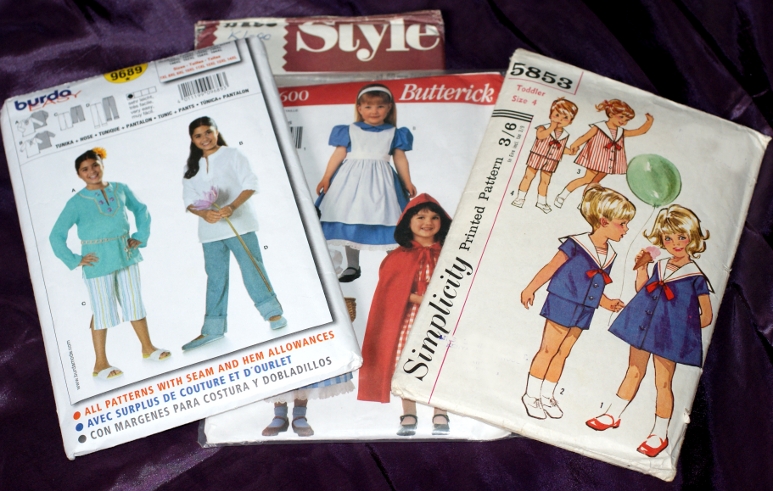
I have recently been given lots of patterns on free cycle, some modern and some vintage and we will be trying to make some of our own clothing by adapting these. There are also many patterns and tutorials available on line to try.

Just to let you know after our third trip into the city and after visiting lots and lots of shops we did find a pair of looser fit jeans that she liked. What a challenge!

Monday, 23 May 2011

Soap nuts!

I am writing this post as there has been a lot of interest in how we got on with the soap nuts trial. We have been trying lately to rid ourselves of as many of the everyday chemicals as possible, in an attempt to make our lives more natural and greener of course. One of the things changed is the way the laundry is done, we were originally going to make our own environmentally friendly washing powder but in the end decided to give soap nuts a try.


So, here they are.... they don't actually look like they will do the laundry do they?

But it is so simple, just put a few soap nuts in the little bag and I usually wet the bag with hot water and give it a squeeze to give the saponins a head start and toss them in the machine, you don't even need to add fabric softener. We have also been adding a couple of drops of essential oil to the fabric softener drawer to give the laundry our choice of smell but this is not necessary. Each batch of soap nuts can be used for a few washes and composted when finished with, so each wash works out at just a few pence.

More importantly though the laundry has been coming out clean and soft, with absolutely no chemical smell at all. It has been a lovely surprise really, as I wasn't expecting it to work. Things just feel different, in a good way and there has been NO itching what so ever. The big test for me was the the towels, I love to have a soft fluffy towel when getting out of the shower and the soap nuts didn't let me down! While I can't say they clean better than washing products, they definitely do not clean any worse.

The soap nuts can actually be made into many cleaning products including shampoo, but we have not tried this yet. My husband has washed his hands with them after working on his bike and in the garden and they did come up very clean and soft but that's as far as the testing has gone. He was also excited to find some black seeds in our bag of soap nuts which he is now going to try and grow...I'll let you know how that comes along too.

If you would like to find out more about soap nuts you can read more here, or just search yourself.