Sunday, 22 July 2012

Survived the Birthday Season

Just a quick post to show you a couple of photographs of cakes, we have just survived the busiest time of the year for us with four birthdays and a wedding anniversary to contend with. My two youngest children had birthdays a week apart and thankfully the birthday cake designs were a little simpler this year.


This is the cake I made for my son, he loves to play Spore and wanted a galaxy style cake so I combined the two things and added stars, planets and space dust. There are creatures from the cell stage around the edge too, much easier than last years dinosaur cake which can be seen here.


This is the cake I made for my daughter, she is still a huge Hello Kitty fan, and her favourite colour is pink so I just combined the two things. Last year we shaped the whole cake to look like a head, it can be seen here.

I only made these two cakes and my eldest daughter made the other two Birthday cakes one of which was mine, obviously I couldn't make my own cake. I didn't take a photograph so I can't post it here but it was a beautiful purple cake with a cat on top, she also made her boyfriend's cake which was shaped like a formula one car and was fabulous.

Everyone had a wonderful time on their birthday but we are absolutely shattered, as you can imagine.

Wednesday, 27 June 2012

Third wedding anniversay

A few days ago my wonderful husband and I celebrated our third wedding anniversary, although we have been together a lot longer than this. We made a pact when we married to hand make each others gifts according to the traditional anniversary guide and the third anniversary is leather. I had two ideas about gifts to make, the first was a handmade leather journal as I think they look gorgeous, but I had a little trouble finding the right kind of leather, so this project will be put off until later in the year.

I settled on a leather bracelet as the leather thread is easier to locate, I love the multi stranded mens bracelets but thought that might be a little more of a challenge to a first time leather user. So decided to stick to something I have been trying out lately, Macrame.


This is a close up of the bracelet, it is made using the macrame square double knot stitch. It is quite tough to pull tight enough as it is leather but I think it works very well.


As you can see I used a bead as a fastener and this finished bracelet does look amazing on his wrist.

Just like to finish by saying Happy Anniversary to my wonderful husband x x x

Oh and if you like to see the lovely gift he made for me you can visit his blog here.

Saturday, 23 June 2012

Natural Update

This is my 100th post and I would like to take a second and thank everyone for reading my blog, the counter at the bottom of the page stands at over 46,000 visitors. I would also like to thank the many websites around the world that have featured our crafts, and all of you who have been inspired and have inspired me in return. Thank-you again, the children and I have some exciting crafts lined up and we will be sharing here soon.

As so many of you have asked how we are getting on with the natural cleaning and cutting out the chemicals I thought I would give you a quick update.


We are still using and loving the soap nuts, (these are dried berries not nuts) it has been over a year now this is my original post, in fact we still haven't got through the 1 kilo bag we purchased, this cost around £10 delivered to our door with a bottle of free essential oil and has lasted more than a year. There are 300 grams left, and not buying washing powder and fabric softener has saved us a lot of money and decreased the amount of household waste we throw out. I also love the fact that you can add the essential oil of your choice to the washing, I have been adding lavender to the bedding wash to enhance good sleep and citronella to the wash when there are lots of biting insects about. No harsh washing chemicals have also meant no itching and sneezing.

All general purpose kitchen cleaners, window and floor cleaners have been replaced by white vinegar, bicarbonate of soda, lemon juice and essential oils which we make up ourselves. I really haven't noticed any difference in the cleaning ability, it just smells far more natural. We are still loving the home made toothpaste too.

The natural crystal deodorant is absolutely still being used, I bought it in July last year for about £5. I am just as happy with it as I was then, no armpit smell at all. My husband was so impressed he now uses it and there is still over half a stick left, so definitely a good money saving purchase there.

Another money saver for me has been the purchase of a menstrual cup, initially expensive but it pays for itself after a few months and it can last for years. I have been using one for quite a few years now and can honestly say I have never felt so free and comfortable during a period, so this has eliminated the need for any sanitary protection.

I have stopped using shop bought moisturisers and now use either pure coconut oil or a block of shea butter, both of which smell incredible and and make my skin feel amazing. So no more nasty chemicals absorbed through the skin. I have also stopped using hair conditioner, oils to stop frizz and all the other stuff we tend to put on ourselves after washing our hair, I now add a little coconut oil to my hands and work it on the tips of my hair.  One thing I have noticed, bizarrely, is the condition and softness of my hair has vastly improved.

As you can see we have managed to get rid of loads of the chemicals from our daily lives and I am still working on more and will let you know how it goes. Not only have we saved a lot of money... I mean...How many of you can say you have done your entire family's washing for less than £10 for more than a year or less than £5 for deodorant for two people?... but we also feel much better, no sneezing or itching and I am happy that everything we now use is a change for the better for us. I may be adding some of our natural recipes here now and again if anyone is interested.

Saturday, 19 May 2012

Dinosaurs in the park

Last weekend our city was visited by Erth's Dinosaur petting zoo, it had traveled all the way from Australia, so we really couldn't miss the chance to see it especially not with all the little dinosaur experts in our family. It was amazing, so glad we took the time to go. The park was packed as thousands of people came to see the show.


This was my son's favourite, a Australovenator. It got a little worrying for a time when the keepers stated he was hungry and the audience was made of meat!


As you can see he was a little anxious as the dinosaur was hungry and seemed very eager to eat the audience.


He was fed and all was well again, all this didn't worry my daughter at all, she was very eager to get selected to go on stage and put her head inside it's mouth but I think she was too small to be chosen.


My daughter liked the little ones best, and enjoyed her face to face encounter with this laellynasaura. Erth has a website if you would like to see some of the things we saw you can see it here. If you get the chance to go along and see the show my children would highly recommend it.

Thursday, 10 May 2012

Regrowing Celery

As a home educating family, we usually have many experiments on the go at any one time and I am really excited to show you this one of mine. I am a huge fan of raw food especially salad and we also love to grow our own food. Having recently read many articles about regrowing celery from the stub part that is usually thrown away, I decided to give it a try.... lured by the thought of free food. Each week I cut the bottom off the celery and put it in a bowl of water.


Some people just kept it in water for one night then planted it in the garden but we were curious to see the new growth and growing celery in England is a bit of a challenge, from what I have read, as it is not at all frost hardy and shouldn't be planted out until May or June. As you can see the celery just continued to grow.


In the photograph above I have arranged the celery in age order so you can clearly see the growth, there is about a week or two between each stump. You can see on the second plant from the left a new root is forming at the base.


The new celery plant continues to grow from the center, some of the outside stalk does die back but is easy to peel off to reveal your new plant.


These are the two largest celery plants now, I have had them potted up for a few weeks, as it is still too early to plant out. The plants have really taken off since they were put into compost, as you can see, they have had a lot of new growth and the roots are starting to come out of the bottom of the pots. I have been getting them used to the outside temperature on nice days to harden them up ready for planting out soon.


I now have about six new celery plants, grown free from the pieces we normally throw away, we are really looking forward to harvest time as this has been quite an exciting project for the children to see. Why not have a go yourself...

Friday, 13 April 2012

Chicken Update

Lots of exciting news since the last chicken post, we had our first egg on march 16th from Ginger much earlier than we expected. So that was a big surprise not only to us but also to the chicken who was caught short and laid it in the middle of her run with a very confused look on her face.


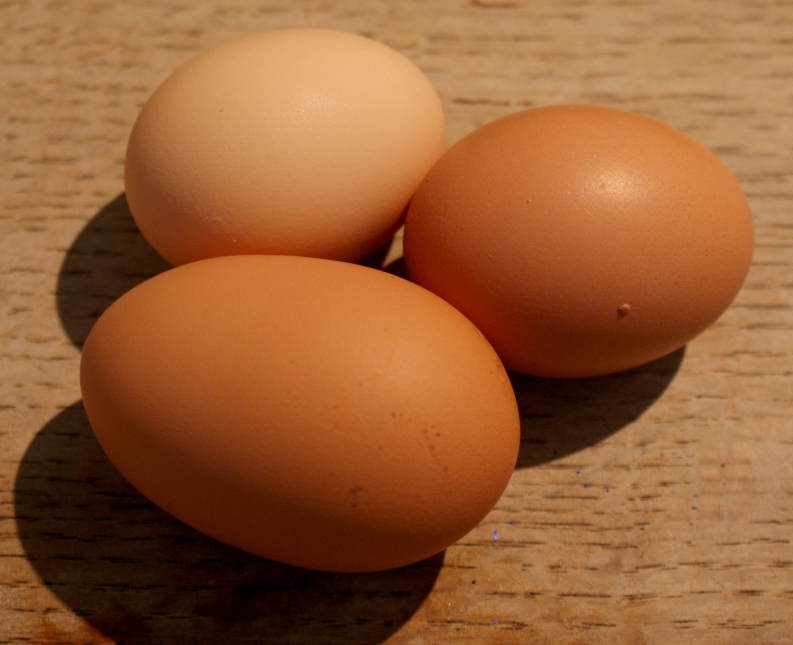
The egg on the bottom is our first egg from Ginger, the egg on the top is for size comparison, it is a medium free range egg and only slightly larger. It was about a week later we started getting eggs from Dotty, then another week after that that Zelda joined in, rather dramatically as her first two eggs came just an hour apart with no shells.


This was a few days worth of eggs at the beginning of April, as you can see a different size and colour from each chicken, very handy for recipes requiring different sizes and the children love to pick out the egg they want for lunch. The chickens have changed quite a lot too, their combs and wattles have grown as has their tameness.


This is dotty now, she lays the caramel brown speckled eggs and loves to sit next to you on the garden bench especially if you have food.


This is an updated photograph of Ginger, layer of the first egg, she lays quite large medium brown eggs and is quite vocal.


This is what Zelda looks like now, she lays the light creamy coloured eggs. She is 'the boss' chicken and a regular escapologist, my husband has had to raise the height of the run several times. When she escapes she usually just digs for worms and grubs in the veg beds, although once she was caught eating the cabbages.


This is a very common view of the chickens, always digging about. They are currently watching my husband making some changes to keep Zelda in.


The chickens are very curious creatures, what ever you do in the garden, they are right there with you especially if you are digging or weeding. As soon as they hear the back door open they come running up to greet you, or should I say frisk you for food.


The children have been having the time of their lives spending time with the chickens and can often be found in fits of giggles, worm in hand being chased round the garden by three chickens. This has also been very educational for them and they have learnt many new things, one of their favourite jobs is collecting the eggs while they are still warm.


We now get three eggs every single morning and got a very large surprise the other day as you can see above. The egg was huge and weighed almost double that of some of the other eggs, it was laid by Dotty and turned out to have a double yolk.


Here is another picture of the large egg next to two of the other eggs I had in the egg box. We are all enjoying being chicken keepers and especially loving our three little feathered friends at the bottom of the garden.


Saturday, 7 April 2012

Melted Fabric Flowers

Over the Winter I have been trying out a few crafts and I thought I would share a couple of photographs here with you quickly. Melted fabric flowers are something I have been wanting to try for a few years, and kept putting off, but as it turns out they are quite simple.


I have cut out a few circles of man-made fabric decreasing in size towards the middle and snipped the edges where the petals should go. Then you slowly lower the edges towards a candle flame...I started quite high above the candle you will notice when the fabric starts to melt probably about 4 to 6 inches above the flame, you need a gentle approach here and never get low enough to touch the flame.

Man made fabric melts whereas natural fabric would probably burn, I took safety precautions here and had a bowl of water close by just in case but nothing has ever caught fire. As you can see in the photo when the edges melt they curl inward like flower petals. I have stacked together a few colours and glued beads in the center to give the flower an anemone look.


I used one of the flowers on this hand made card for my daughter. I also sewed one on the crochet hat I made for my youngest daughter.


This hat was very simply worked without a pattern just increasing from a ring until it was the right size. I made the flower to go on the side of the hat as seen in the above photo but my daughter had other ideas and always wore it on the front of her head like a little mini pink Dalek.