Showing posts with label thrifty. Show all posts

Monday, 14 October 2019

Crab Apple Jelly


It's that time of year again when we are having to harvest and preserve all our crops to see us through the winter. Crab apples are often left on trees and not used as they are small and very sharp tasting but it is very easy to turn them into a delicious jelly, jam or wine. We love their taste so much my husband bought me some trees as a gift a few years ago, so we can now harvest our own from the garden.


After harvesting, I usually wash and chop the apples in half to check they are good and not full of insects or rotten inside. Place all your apples into a large pan and add enough water to just reach the top of the apples, the juice of a lemon can be added to help prevent browning of the apples although it's not compulsory, then boil until the apples turn to a pulp.


I leave the cooked apple pulp mixture to cook slightly as it's much easier to get cooled apple into a jelly bag or muslin bag to strain and you are far less likely to burn yourself in the process.

The straining may take some time, maybe even a few hours and I usually tie my jelly bag onto the handle of the kitchen cupboard so that I can leave it and come back to it later. It is important not to squeeze the jelly bag if you would like clear jelly.


You may notice that I haven't given you exact weights and measurements so far... that's because the measurement that matters most is the ratio of sugar to strained liquid. Learning the basic rules like this mean you can make a little or as much jelly as you want, depending on your quantities of apples available.

Once your apple liquid has finished straining measure it and return it to the cooking pan, use a like for like ratio when you add your sugar. For example if you have a litre of liquid add 1 kilogram of sugar. Notice I've used both metric measurements here, if you are using imperial it would be the same ratio but in pints/pounds.


Apples have a high pectin content so it's not necessary to add any further pectin, bring your liquid and sugar to the boil stirring constantly. To check if your jelly will set a plate which has been in the freezer for a little while should help, spoon a little jelly onto the cold plate a leave it for a minute or two to cool. Once cooled, slide your finger through the jelly, it should wrinkle up if it's ready to jar up. If not boil a little longer until you have reached the wrinkle stage.


Pour into sterilised jars and leave to cool, I always find this jelly has a very firm set even though it looks like it will never set. This is one of my favourite jellies and tastes amazing on toast or scones.

Tuesday, 9 January 2018

New Year, Bargains and Excesses!

We are back after our winter break and would like to wish all our readers a very Happy new year full of new adventures. Just thought we would give you an update of a few of our adventures over the last week or two. Our baby Christmas / Yule tree has been outside now for a couple of weeks and is looking much better.... hopefully it will continue to grow all year ready to be brought in again for next year.


The decorations have been very carefully packed away... If you follow our blogs you will know that we hand make a lot of decorations and each one contains so much love and so many memories of past seasons and the children growing up that we would absolutely hate to lose any of them.


As an extremely thrifty living family this careful packing also saves us much money each year... Talking about thrifty living, we have used the January sales to stock up on anything we may need for next Christmas at just a fraction of the price!


We have bought the crackers and all of the wrapping paper for next year for bargain prices many things were just a few pence, plus some rolls of paper which could also double up as other occasion wrapping paper, for example stars can be used as birthday or congratulation wrapping paper too. Extra thrifty bonus points! No need to worry or stress about these things throughout the year or in the run up to Christmas now.


Another good money saving tip is to look out for bargain foods after Christmas... most supermarkets are wanting to offload their seasonal excesses very cheaply. One of the things we bought were these parsnips for just 3p a bag, I have to admit we bought lots... more than 10 bags. Well, we do eat a lot of vegetables and most of them have been prepared for the freezer, ideal to grab a handful for a casserole or just for roast parsnips. We have also been enjoying parsnip crisps too.


My freezer is also now full of carrots too, apart from the ones used for carrot stick snacks and of course carrot cake. Not only has this saved us a lot of money, it has also stopped a lot of food being discarded and ending up in landfill. As a zero food waste family this means a lot to us!


For the whole festive season we have been enjoying the beautiful flowers on my rhipsalis pilocarpa cactus plant, it's like looking up a lots of tiny white stars. We are also looking forward to the new season of growing especially with the arrival of our new seeds.


So once again we wish you a very happy new year and good bargain hunting!

Wednesday, 20 December 2017

Natural wreaths

Following on from my last post showing how we made the wreath bases, I promised to add a few photos when we had finished decorating them. We prefer the natural look and usually prune a little overgrown greenery from our gardens to decorate with, which has the added bonus of being completely free.


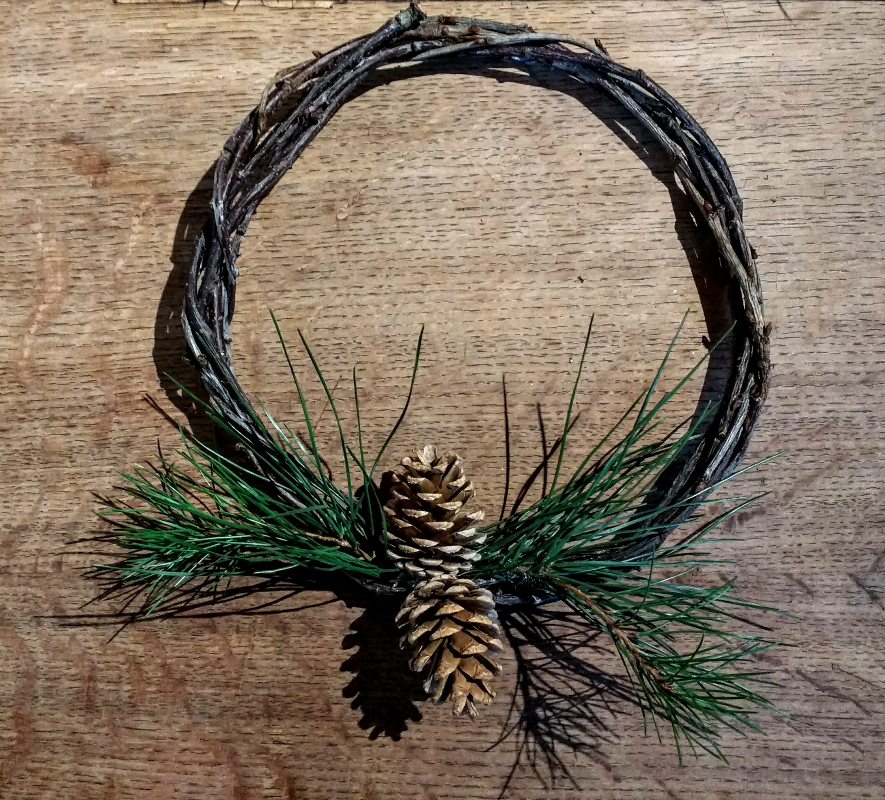
This is our front door wreath, as you can see it has a completely green and natural look. I have used clippings from holly, ivy, pine and added a few pinecones. Some twigs have just been woven straight into the twig ring bases and some things, mainly the pinecones, have been wired on to hold them still.


I have also made a few very simple ones to add to the back of some of our internal doors, as you can see I have woven in a small piece of pine and stuck a couple of pinecones on with a hot glue gun. I'm not sure yet whether to add a little snow spray.

These ring bases can be decorated as elaborate or as simply as you choose and the bases can be kept and used year after year with a new decor each time. Very simple, very quick and very thrifty.


Wednesday, 29 November 2017

Pine Cone Garland

I recently posted some photographs of our pine cone garlands on social media and was inundated with questions on how to make these and many people commented on how beautiful the finished garlands looked. So I have decided to post a little guide on our very thrifty and natural Autumn, Yule or Christmas garland decorations.


My husband and I decided over 12 years ago that we would embrace thrifty living... no more shop bought decorations for us!!... Everything we wanted we would make as thriftily as possible. Not only has this saved us so much money, unpacking our lovingly, handmade Christmas decorations every year holds so many memories.

I absolutely love the simplicity and natural beauty of these pine cone garlands, the one above was made for Autumn but I also have one that was made for Christmas a few years ago which has a few more sparkles.


First you will need to collect some pine cones, we usually grab a few throughout the year as we find them. The amount of pine cones you need will depend on the length of garland required, I'm using seven for my mantle piece. I usually leave them outside for a little while to ensure that any critters safely leave the pine cones.


To make the fixings we are using screw eyelets, they are really cheap only a few pence for a bag. I have managed to screw these directly into the end of the pine cone by hand but it is a little fiddly, so if you need help starting your hole, a very thin drill bit may give you a start.


 Next just thread your pine cones onto your chosen string or ribbon, we are using natural jute string here but ribbons work just as well and there is less movement of the pine cones. You may notice if using string that all the pine cones slip to the middle when you try to create a swag in your garland, you could tie them on to keep them still... but I have another remedy for this...


A little trick which allows you to easily fix them in place but still allows them to be movable if you need to change the position of a pine cone. Thread the string through your eyelet and then thread it through again, as seen in the above photo... so you create a loop.


This simple act gives your pine cone a little more resistance so that you can move it but it doesn't slip down the string.

These garlands can be kept natural or decorated for Christmas with a little glitter, paint or fake snow... the best part is it has literally taken a few minutes and cost a few pennies to make, and this beautiful garland can be reused every year.