I promised some of you a look at the doll's house that my lovely husband made for my daughter for Christmas. The soft furnishings have all been hand made by me, and as yet the house has only had a basic finish but we are hoping to add to it as time goes by and my daughter's tastes change. You will find some photographs of the beautiful house here, go on have a quick look... I'll wait.
This is the attic room of the house, it has been decorated as a children's bedroom and play room, I think it is my daughter's favourite room so far. The pretty wall stickers were a chance find in a local pound shop, the bunting fits exactly into the space. My husband made all the furniture in a chunky but durable style to make sure that they survive vigorous toddler play, and again those handy stickers were added to the ends of the beds for cuteness. All the bedding was hand stitched, foam was covered with old candy stripe sheet material to make the mattress and the pillows and bench pad are made with checked gingham. The quilt covers have been made so that they are double sided in case she feels like a change, quite simply by sewing two squares of fabric together and stuffing them. One side is purple checked gingham and the reverse side from a different fabric, you may notice this on the bed with the doll in more clearly. The little rug was just a knitted square using very small needles and fuzzy wool so that the effect is that of a rag rug.
This is the lounge set again my husband went with a simple, chunky set for now and I made the sofa cushions in my daughter's favourite colour, the fabric is actually from one of her much loved t-shirts which was recently outgrown. The little cushions are crocheted in a matching colour by simply doing a ring then one further row twice and sewing the little circles together. The flat screen TV was made using the case of an old mp3 player, glued on a wooden stand with a cartoon photograph, laminated and stuck inside. I am quite pleased with how this turned out because it looks very realistic.
As you know, the house was a Christmas present, so it only seemed right to add some seasonal decorations. The tree is made from a cone of green felt, glued onto a stick and in turn into a wooden base, then decorated with ribbon and sequins.
A wreath for the front door was also made by twisting and gluing an old branch from an artificial tree into a circle, adding a few tiny pine cones and ribbon to hang it with. That's it for now.... what do you think?
A thrifty and natural life...full of magical crafts, money saving tips and home educating along the way.
Friday, 20 January 2012
Sunday, 1 January 2012
Happy New Year 2012
Not the sort of Happy New Year photograph you usually see... but this calendula photograph was taken in my herb bed this morning, nature's fireworks bursting through. Just a quick post to wish you all a Happy New year and to thank-you for reading. We have been so busy here that I haven't had the time to write as much as I wanted to and many things went unfinished. So will quickly update you on some of the things we have done.
As the children really enjoyed working with clay and making the Autumn leaf bowls we decided to buy a large bag from the art shop. Some of it was put to good use making tree decorations, the children used dough cutters to cut out their shapes and these were then painted and varnished.
I also made some and stamped words on them with our metal stamps before painting them with metallic purple paint. I stamped our names on some to use on the crackers and as gift labels but totally forgot to use them in all the excitement. As shown in previous posts we made some of the tree decorations, this is something we always do to create special memories for the children. We also made all of our Christmas cards, this year we kept most of them very simple due to time limitations.
The children had a lot of fun making our chocolate Yule log and home made sweets, this year we made marshmallow snowmen, fruit and nut chocolate bark and marzipan snowballs. A lot of time was spent making things for the doll house that my husband made for our daughter, I was in charge of interior design, will try to remember to post pictures here soon. I am a little relieved to have a calmness return to the house now that the celebrations are over and the decorations have come down.
I have made a start on my 'sort of' new year's resolutions already, by making my own toothpaste. I never make huge resolutions that are so overwhelming you fail after a couple of weeks and end up feeling bad about yourself. I only make small achievable aims and when these have been completed will then make another goal and another, right throughout the year, this way there are lots of small successes. The feel good factor from this is better and when you look back on everything you have done it is quite like a big resolution anyway just taken in small steps and without any stress.
Hope you all have a wonderful 2012.
Monday, 19 December 2011
Crochet Snowflake
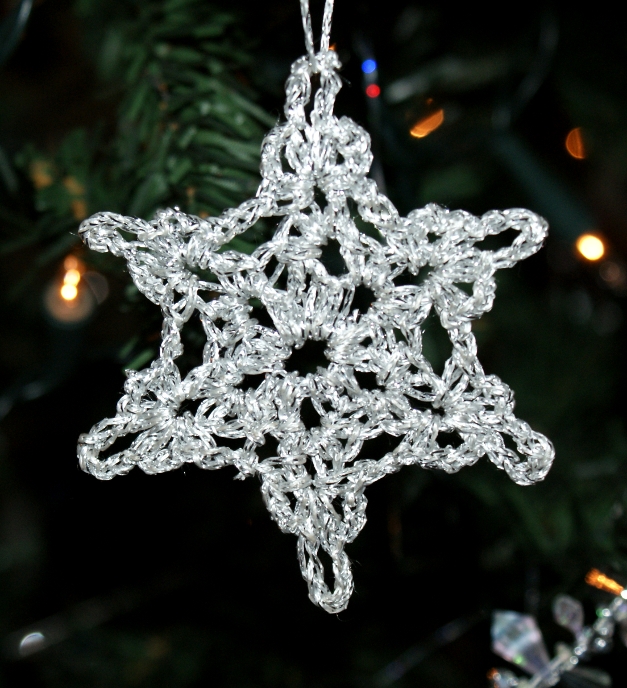
Just a quick post to show you the crochet snowflake I made earlier, as you know my husband and I usually try to make some new decorations for the tree each year. This year I have already made quite a few things but I set myself the challenge of making a crochet snowflake... so here it is.
Not too bad for a first attempt... I hope anyway. It is made with metallic silver thread and I was thinking of making a garland of them for the window but I have dropped the thread in my coffee and had to wash it. Really hope it will be OK but it seems to be taking ages to dry so one hanging decoration will have to do. I got the pattern for this snowflake from pinterest, if you would like to make one I'll post the link to attic24 here.
Bark snowman
There are some trees near us that seem to shed some of their bark in Autumn every year, it's very distinctive because they look camouflaged while this is happening. This year we collected a few pieces to see if we could make something from it. The children love to work with all different materials.
It's best to cut it to shape just after you collect it as the more it dries out the more brittle it gets. This bark was only collected from the ground after it was shed, no trees were harmed. The bark was then painted, we chose white for a snowman.
Then added all the felt extras, like a scarf, hat and face. If you look closely at the snowman the texture of the bark shows through the paint, and I have been thinking that it would be a beautiful texture for an owl, so I may have to try that too.
This is our finished snowman, he will either have a ribbon to hang him from the tree or maybe he will be fixed to the front of a Christmas card.
It's best to cut it to shape just after you collect it as the more it dries out the more brittle it gets. This bark was only collected from the ground after it was shed, no trees were harmed. The bark was then painted, we chose white for a snowman.
Then added all the felt extras, like a scarf, hat and face. If you look closely at the snowman the texture of the bark shows through the paint, and I have been thinking that it would be a beautiful texture for an owl, so I may have to try that too.
This is our finished snowman, he will either have a ribbon to hang him from the tree or maybe he will be fixed to the front of a Christmas card.
Thursday, 15 December 2011
Old Christmas Angel
We all have memories of Christmas past, for me opening the Christmas tree decorations every year holds so many memories of times past that I really need to pause to take it all in. There are the decorations for each of my children's first christmas, the one to symbolise our wedding, the beautiful vintage French ones my husband bought me, all the ones we have hand made over the last few years.... I could go on but first I would like to introduce you to a dear old friend of mine, this is her 22nd Christmas, she looks a little worse for wear but she has been greatly loved by lots of little children.
She is the sole survivor from a pack of three, still smiling and bringing cheer from behind her tired, faded blue eyes and tattered wings. This year I decided to try to make her some new friends, the idea came to me when I made the nature faeries for the Autumn solstice and I was quite excited when I found exactly the right type of small pine cone the other day.
To start with I cut the pine cone off the twig leaving a little stump, to insert into the bead for the head, this makes it a little stronger and a better fix for the bead using a hot glue gun.
Then traced round the old angel's wings onto the new wing material, I have used thin foam self adhesive sheeting, the other side is covered in silver glitter. I cut two wing shapes out for each angel and stuck them back to back to make both sides glittery but card would work just as well here.
Then we spray painted the new angels in silver, I really love the little acorn cup hats so decided to add these to our angels. These were also spray painted silver and had glitter sprinkled on top, my husband drilled the little holes so that we could add the string to the top to hang them from the Christmas tree.
Then you just need to assemble all the parts, we threaded silver thread through the hat and also added a little hair before we glued the hat to the head and the wings in place.
Three finished angels, I'm not sure whether to add faces or not so I have left them blank at the moment while I think about it.
Here they are together hanging on the tree, they look quite similar and I would love to think mine could last 22 years. I may keep a look out for something more angelic to use for the wings but in the meantime my youngest daughter loves them and has already given them a few kisses to welcome to the family.
This is one of the nature faeries that I made for the Autumn solstice, I sprayed him silver too so that he would kind of match the others.
She is the sole survivor from a pack of three, still smiling and bringing cheer from behind her tired, faded blue eyes and tattered wings. This year I decided to try to make her some new friends, the idea came to me when I made the nature faeries for the Autumn solstice and I was quite excited when I found exactly the right type of small pine cone the other day.
To start with I cut the pine cone off the twig leaving a little stump, to insert into the bead for the head, this makes it a little stronger and a better fix for the bead using a hot glue gun.
Then traced round the old angel's wings onto the new wing material, I have used thin foam self adhesive sheeting, the other side is covered in silver glitter. I cut two wing shapes out for each angel and stuck them back to back to make both sides glittery but card would work just as well here.
Then we spray painted the new angels in silver, I really love the little acorn cup hats so decided to add these to our angels. These were also spray painted silver and had glitter sprinkled on top, my husband drilled the little holes so that we could add the string to the top to hang them from the Christmas tree.
Then you just need to assemble all the parts, we threaded silver thread through the hat and also added a little hair before we glued the hat to the head and the wings in place.
Three finished angels, I'm not sure whether to add faces or not so I have left them blank at the moment while I think about it.
Here they are together hanging on the tree, they look quite similar and I would love to think mine could last 22 years. I may keep a look out for something more angelic to use for the wings but in the meantime my youngest daughter loves them and has already given them a few kisses to welcome to the family.
This is one of the nature faeries that I made for the Autumn solstice, I sprayed him silver too so that he would kind of match the others.
Saturday, 10 December 2011
Paper and glue snowman sculpture
We have recently been making seasonal models from paper and glue, we saw a more adult version on a Home made craft show with Kirstie Allsop. I loved the look of the birds on the show and may at some point try a decoupage model myself, the link shows you the one from the show. We have adapted the decorating slightly to fit in with what the children wanted to make.
First make the basic shape using scrunched up paper, we wanted to make a snowman so we scrunched up some newspaper balls and taped them into the correct shape. Be generous with the tape and cover the entire ball until you have a smooth shape. At this point it is easiest to paint over the tape with acrylic paint to give the glue something better to adhere to and leave to dry. On one of our models we missed out this step, the paper still sticks but may take a little extra glue.
Once your model is dry, use PVA glue and stick small pieces of paper all over it, a bit like papier mache. The artist on the television show used brightly coloured paper for this and produced a lovely decoupage effect but we used white paper, as we had plans for our models. My son decided to make a plesiosaur, not technically very seasonal but he loves dinosaurs. Instead of making scrunched up balls for this we had to mould the paper to the correct shape and tape on the limbs.
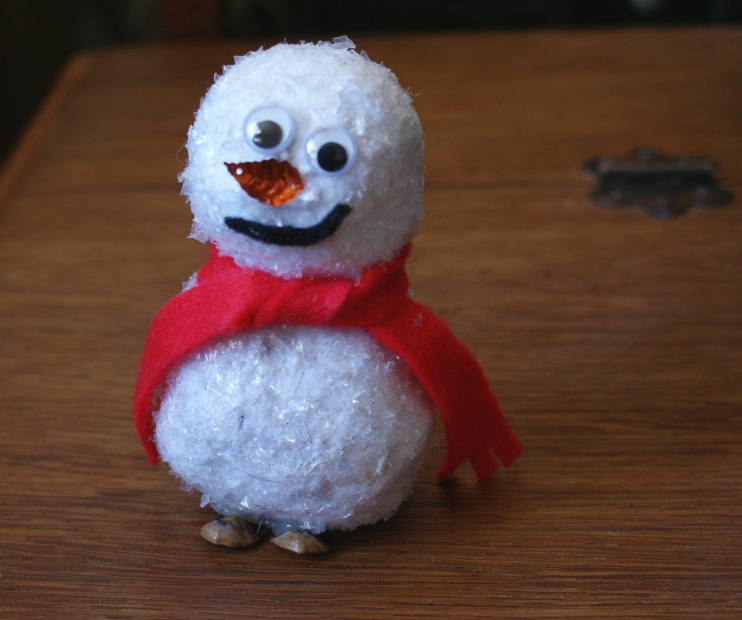
For the snowman, we covered him in glue and rolled him in a bag of fake snow so that his whole body was coated. Then we just stuck on his face and added a very simple felt scarf and tiny feet to complete the look... a very cute little snowman. Anything you can make out of newspaper and tape can be given the same treatment as you have seen with my son's plesiosaur, which he has decided to paint.
It is not finished yet as it needs another coat of paint, some facial features and a couple of coats of varnish to make it more durable, but I think it looks lovely.
First make the basic shape using scrunched up paper, we wanted to make a snowman so we scrunched up some newspaper balls and taped them into the correct shape. Be generous with the tape and cover the entire ball until you have a smooth shape. At this point it is easiest to paint over the tape with acrylic paint to give the glue something better to adhere to and leave to dry. On one of our models we missed out this step, the paper still sticks but may take a little extra glue.
Once your model is dry, use PVA glue and stick small pieces of paper all over it, a bit like papier mache. The artist on the television show used brightly coloured paper for this and produced a lovely decoupage effect but we used white paper, as we had plans for our models. My son decided to make a plesiosaur, not technically very seasonal but he loves dinosaurs. Instead of making scrunched up balls for this we had to mould the paper to the correct shape and tape on the limbs.
For the snowman, we covered him in glue and rolled him in a bag of fake snow so that his whole body was coated. Then we just stuck on his face and added a very simple felt scarf and tiny feet to complete the look... a very cute little snowman. Anything you can make out of newspaper and tape can be given the same treatment as you have seen with my son's plesiosaur, which he has decided to paint.
It is not finished yet as it needs another coat of paint, some facial features and a couple of coats of varnish to make it more durable, but I think it looks lovely.
Altered Wreath
Just a quick post to show you our door wreath, I brought the one below locally for just one pound 7 or 8 years ago, and for a couple of years we just hung it as it is with no alterations.
But for the last few years we have been altering it quite a bit using the original wreath as a starter point. We have quite a large amount of overgrown ivy at the bottom of the garden, which comes in handy at this time of year for the decorations, the holly is also from a little bush by our front door and the pine cones collected from some of our many nature walks.
The ivy is very easy to intertwine through the twigs of the original wreath, I used some copper wire to fix a couple of pieces in place and for the pine cones. We have also added some hawthorn berries for extra colour, I really love these natural looking wreaths at the moment and because we have decorated it ourselves it can be made exactly the way we like it. My daughter helped me to collect the plants from our garden today, (well mostly she ran off with the trug) so it will hopefully add to the lovely family memories we have of the season.
Subscribe to:
Posts (Atom)